The Gregory Garden (and house) are for sale

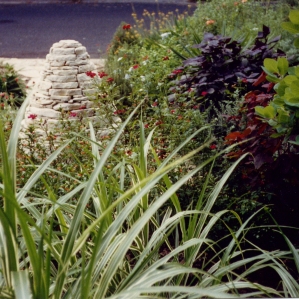
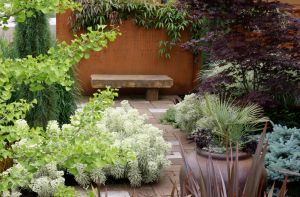
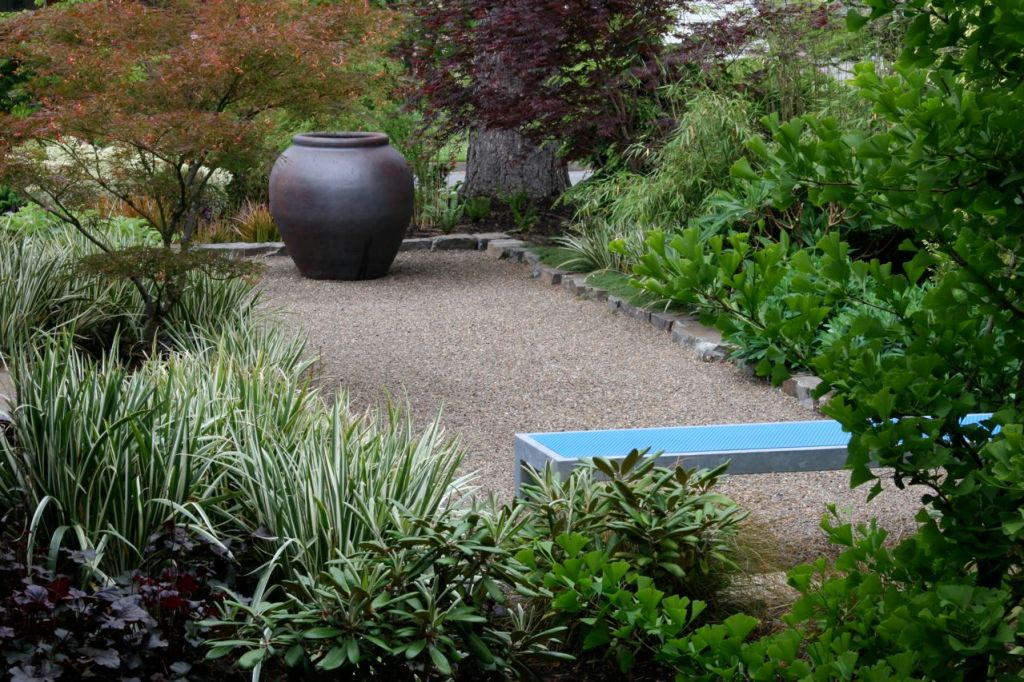
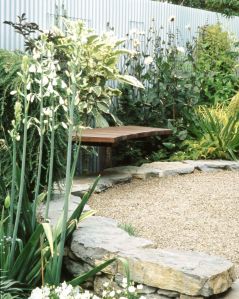
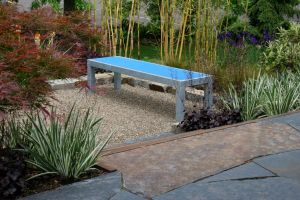
Our friend and client Joy Gregory is moving out of town, and her wonderful North Eugene house and garden are for sale.  We are sorry to see her and her awesome son leave Eugene, but we have no doubt that they'll take their new home by storm.  We wrote the garden in our first newsletter, and you may remember the garden from Sunset, the Register-Guard or Pacific Horticulture (you can find an article or two on our press page).

If you happen to be shopping for a great house, neighborhood and garden, take a look!

http://www.remax.com/homes-for-sale/OR/Eugene/10060366-MLS_Number/

Rock On: Stone 101 - Mosaic Newsletter #9

Happy July!  It's a busy time of year for Mosaic, but we've managed to add quite a few ideas and photos to the journal since the last newsletter.  We discussed everything from our visit to the Ruth Bancroft Garden, to selecting containers for planting, to gardening with feathered and furry friends in mind and much more.  Be sure to scroll through the journal when you're done here!

Stone is an essential element in much of Mosaic's work.  One of our main reasons for being a design/build company is the intricate connection between form and function, and nowhere is this more important than in stonework.  This newsletter shares some of the lessons gathered in years of working with stone. Whether you're an aspiring DIY stonemason or looking for the right pro to help build your hardscape, we hope this article will bring some inspiration and direction to your search.

Stone Design and Selection

When designing a garden, setting the overall layout of the hardscape is our first priority.  Whether we're creating scaled drawings or just hand-waving, we seek to create a unified plan that balances the desired feeling of the garden with the limitations of the site, such as grade, dimensions, and relationship to the house.  We try to design an entire space, say a front yard, at once, even if we only intend to build a portion of it immediately, so that we can be sure that the first phase ties into the following phases.  We save all materials decisions until everyone is happy with the overall layout of paths, patios, walls and borders.

Once the general design has been set, decisions about which stone to use often fall into place.  Aesthetic preferences play a big role, but the stone's desired function comes first.  On important pathways, we generally select a very flat stone, with few surface irregularities to catch high heels or make less able visitors uncomfortable. A stone with a regular surface is a good choice for most patios, as well, as it is easier to de-wobble tables and chairs on a flat surface than one with more bumps and dips.  Of course, a rougher stone can a beautiful choice for many spaces.  In some gardens, we use a rougher stone in secondary paths, and a flatter stone for primary entrances and paths.  If your heart is set on a rougher stone look, there may be a way to use it if you're careful in selecting, laying out and setting each stone.  In our garden, we wanted to find a single type of stone from the Pacific Northwest that could be used for paths, walls and stairs - a tall order!  At the entrance to our garden, we have a very few steps of the slightly rougher basalt that we chose, but we hand picked the best possible stones for each step.

While a stone may look perfect in photos or at the stoneyard, no natural materials just fall into place, and some are a major challenge for a novice stonemason.  Regularity of shape and surface, workability and average size vary between varieties of stone, and each characteristic presents its own challenges and opportunities.  Average size is a good example.  Small stones are easier to move, but they are more difficult to stabilize.  Discuss your options with the knowledgeable folks at your stoneyard.  Be honest about your skill level, the amount of time you can dedicate to the project and the tools you have or are willing to rent or buy (some stones can only be cut with a big, heavy, gas-powered wet saw - not for the faint of heart!).  Don't be offended if they suggest that you consider a man-made product, as those options are quicker, lighter, and all-around easier for the first-timer.  That said, we've seen some pretty darn good natural stonework by amateurs who were willing to dedicate the time and attention to detail their stone demanded.

Once you've taken function and ease of construction into consideration, you may still have a few stone options for your project.  Color is an obvious consideration, but don't forget to consider other attributes, such as the regularity of the pattern, the general size and texture of the stones, and the materials and colors of surrounding features, such as your house.

Goals

"When I start building, I don't set out to make a beautiful wall.  My intention is a lasting structure.  Throughout the day, I apply my efforts to the basic principles of drystone construction.  If I follow them successfully, I'm likely to leave behind a pretty good-looking wall." - Dan Snow

In our opinion, really good stonework has a few recognizable attributes.  If your work (or the work of the contractor is considering) shares these characteristics, you're probably on the right track:

  • Base - Every stone project requires a solid foundation.  In most cases, several inches of compacted sharp gravel is a good start, but discuss options and additions for your particular stone project.  We often spend hours preparing our site before we lay the first stone, from setting the grade to excavation, moving base, grading, compacting, grading, compacting....  There is an unfortunate proliferation of "expert" advice floating around that claims you can more or less plunk stones on essentially unprepared soil.  Ahem.  Don't.  Unless you're just not interested in the long term longevity of your work, do the base work.
  • Careful layout - String lines are your friend.  They make sure that your straight lines are actually straight, keep you at the right grade, and make for impeccably level walls.  Make sure that water runs away from any structures and that the slope of your paths or patios are appropriate for their purpose.
  • Tight gaps - We know of no better visual indicator of quality than consistently tight gaps in stonework.  By taking the time to shape and place stones so that they leave little room between them, you lock the stones in place, creating a longer-lasting, stable product that is pleasant to walk on and beautiful.  There are moments when a "stepping stone" effect can be nice, but we reserve this option for infrequently traveled areas.
  • Stability - The wobble test.  Even the best stonemason may have to re-stabilize a flagstone or two after their work is done, but the vast majority of stones should not move underfoot.  Borders and the top stones of walls should also be firmly set.
  • Dry setting - We rarely use mortar in walls and never in laying flagstone.  Any good stonemason's work, mortared or not, is grounded in careful dry setting technique.  Sometimes using mortar is preferable or necessary, but good, stable stonework should still be the foundation of your project.
  • Time - The variation that makes natural stone so beautiful also demands thoughtful, sometimes slow work.  Each stone requires a different approach, with an eye towards not just fitting into its space, but making the right platform or hole for the next stone.  The rewards come slowly, but they do come, and, in the long run you will be happier with a well-built project than a quickly built one.

(Re)Sources

Dan Snow, the New England stonemason quoted in the "goals" section above, offers a much better and lengthier source for "how to" information than we can provide in our journal.  His book In the Company of Stone is both a gorgeous collection of stonework photos and an invaluable resource.  If you have a moment, check out his website and Flickr stream for lots of neat process photos.

We can't recommend Lane Forest Products highly enough.  They are a great source and resource for your stone projects, and they offer a great selection of materials for any project.  Their stone yard crew is pleasant and professional, even in scorching heat, and we're always happy with the quality of their products.

Last, but, we hope not least, we've put a small sampling  of Mosaic's stonework and a slideshow of the construction of a dry stack wall (rerun from this post) below.  See if we measure up to our own standards!  Click on the images in the gallery for a closer look.

[gallery link="file" columns="4" orderby="title"]

[slideshow id=3458764513843874476&w=426&h=320]

Fired Up for the 4th

We are working on a newsletter for you, but in the meantime, we thought we'd post a couple holiday-appropriate shots of our grill. We built the stone and interior fire brick and designed the custom metalwork.  Although it would work with commercial, bagged fuel, we think oak and fruit wood make for the best flame and flavor.

When it's not in use, the simple lines and intricate stonework make the grill right at home in our garden.

.

Studies in Texture at the Bancroft Garden

Our trip to Northern California was brief, but we are so glad that we made time to visit one of our favorite gardens.  The Ruth Bancroft Garden in Walnut Creek, CA is a mecca for hortitexturephiles and garden lovers of all stripes.  We wrote a short post about the Bancroft Garden last year, but we may not have been emphatic enough in our praise.   It is magical.  You should visit.  Soon.

As you probably know, a sunny summer afternoon is less than ideal for photographing gardens, but Buell managed to get a number of fun shots and (we think) a few pretty darn good ones.

Enjoy!

[gallery link="file" columns="4" orderby="title"]

It's Succulent Day!

Buell arranged our succulent and conifer containers last night.  The arrangement looks great, hunh?  Finishing that arrangement feels like the beginning of summer, our garden's best season.

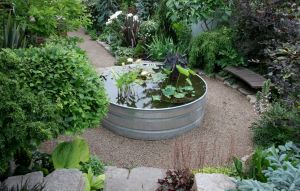
These little pots make a big feature at the center of our upper gravel terrace, and a strong focal point at the top of the stairs from the stock tank terrace.  In many cases, we advocate using large containers to anchor your potted arrangements, but enough small containers can have a real impact.  These containers range from around 6 inches to around 20 inches in height.  Most of them are hand-coiled Vietnamese pots with an ash glaze, but there are a few odds and ends that we've picked up over the years.

.

..

.

Picture Postcard Gardens

Greetings!

Our newest postcard features a few photos of our work (learn more below) and addresses for our website and this journal.  If you're new to the journal - welcome!  Once you've learned about the photos on the card, we hope you'll keep reading.  The newsletters are a great place to start, or you can take a quick scroll through our last fourteen months of photos, ideas and news.  We update every few days during the growing season, so we hope you'll check back soon.

To learn about our Mosaic-designed, 100% recycled-paper postcards read more here.

But for now, on to the pictures!

.

.

.

.

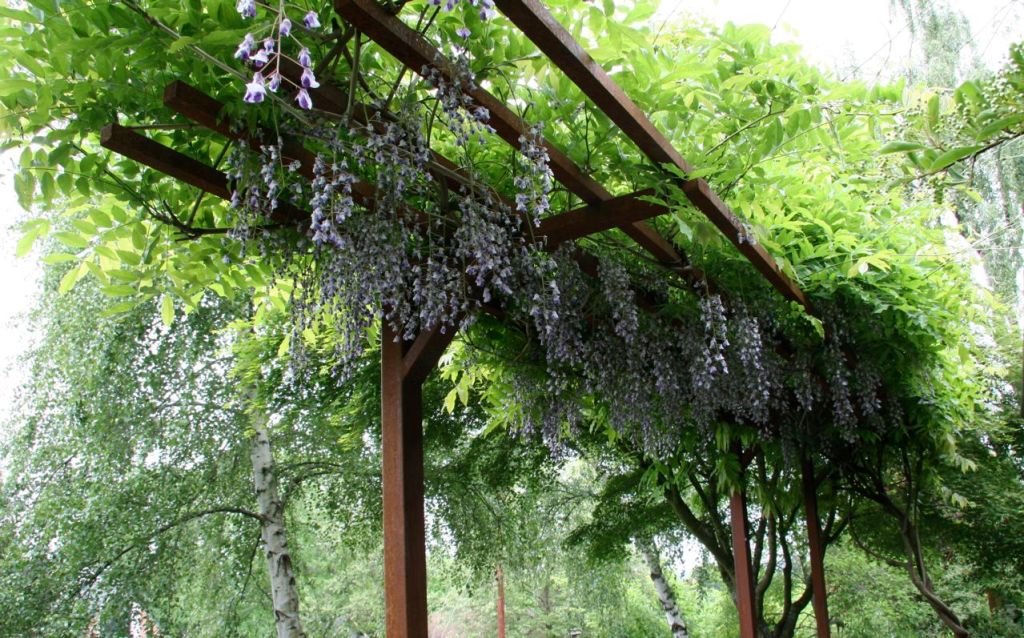
This rusting metal wisteria arbor shades our clients' west-facing seating area.  We designed the steel frame to be sturdy enough to support a mature vine, but aesthetically light enough not to overwhelm the plant's beauty or the view.  When the vine drops its leaves for winter or the vine is cut back hard, the arbor provides a clean and (we think) attractive structure on its own.  If you like the arbor, you might enjoy this post with photos of some of our other custom metal features.

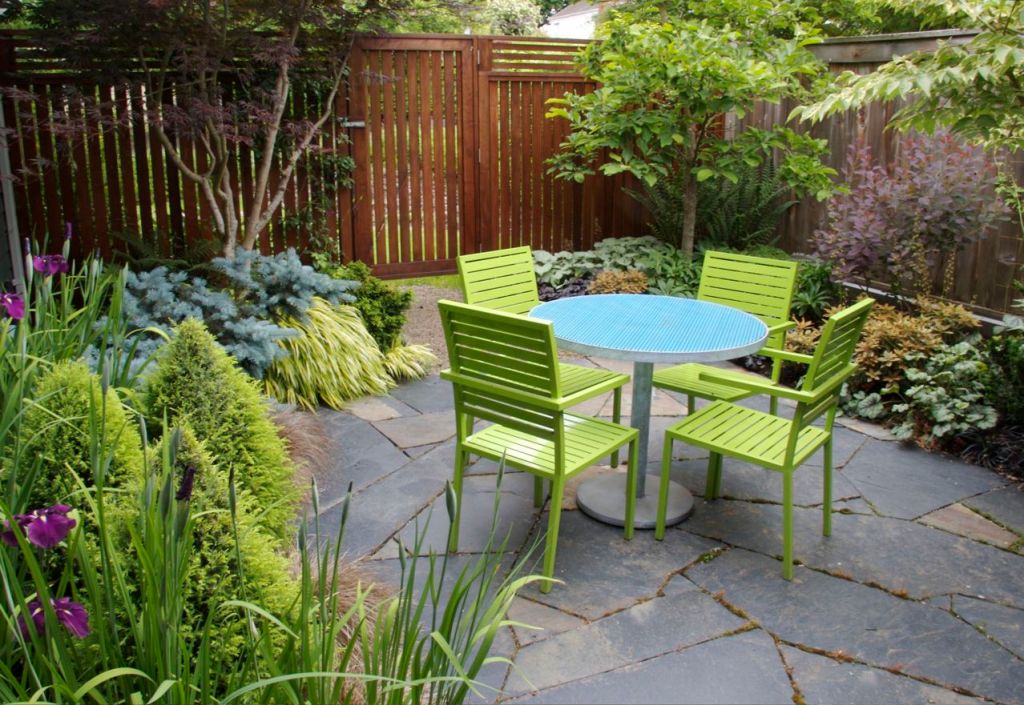
A little courtyard makes the perfect outdoor dining room for clients who love to cook.  The garden is just outside their kitchen, where they spend much of their time, and screened from their semi-busy street by a redwood fence.  We built the redwood fence and stone patio, installed the plants, and even designed the cool metal furniture!  Learn more about this pocket garden in our  6th newsletter, Sit. Stay., where we share some ideas for designing a great seating area, and in a post about our furniture designs.

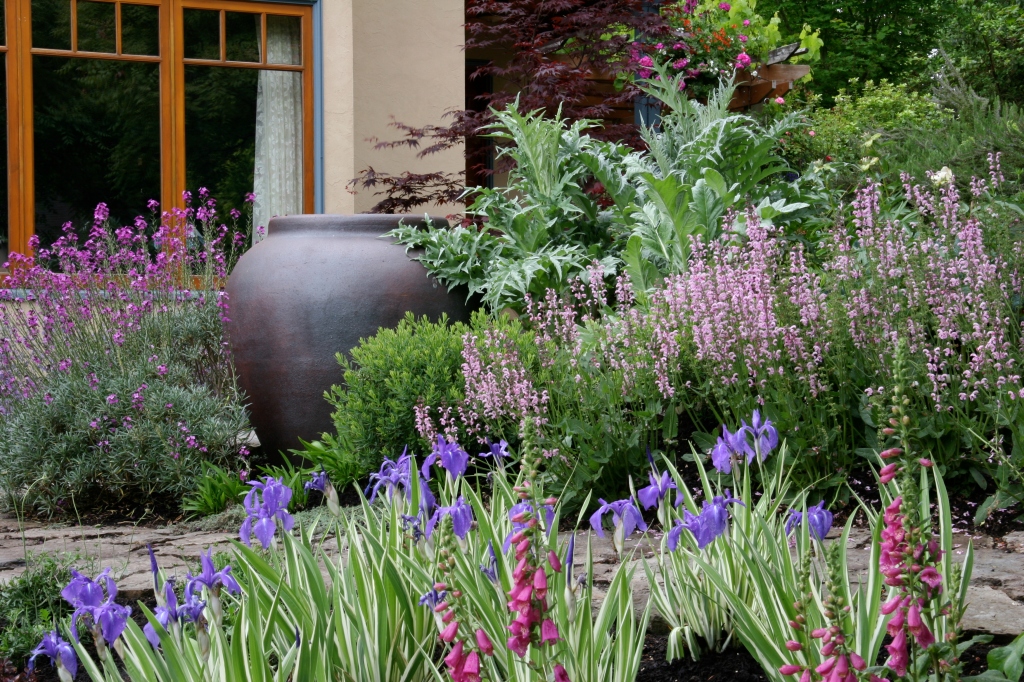
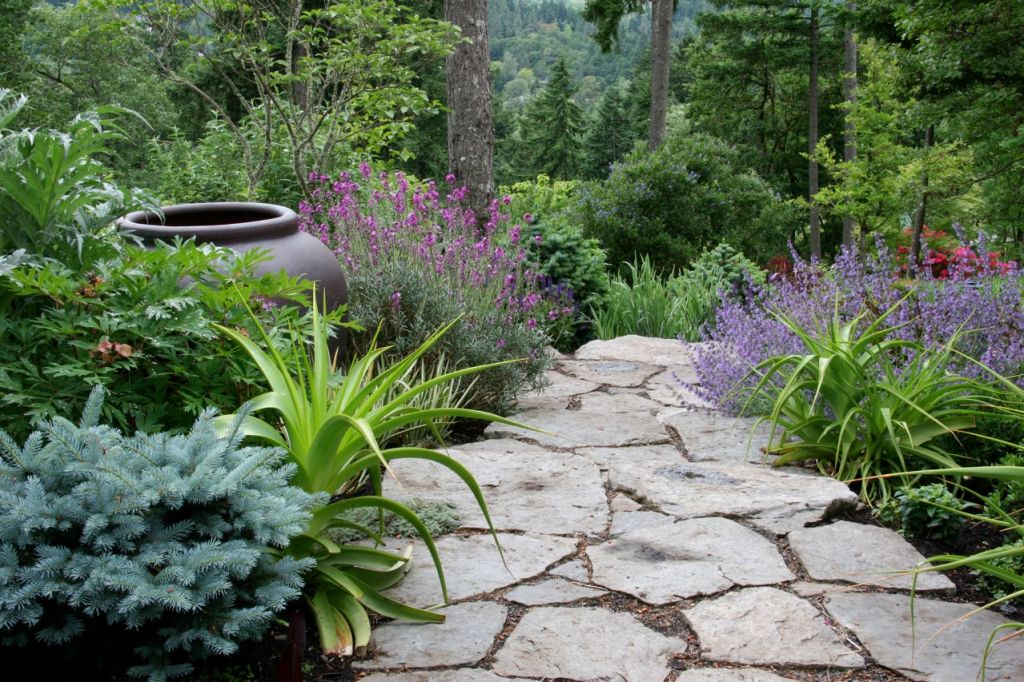
A big, hand-coiled, Vietnamese urn and rustic basalt path anchor this pretty garden.  Our client requested a cottage-style planting with as much pastel floral color as her voracious deer would allow.  We balanced the seasonal color with bold foliage for year-round impact.  This garden has some great ideas, and we've discussed different aspects of it in a recent post about "making a scene," a newsletter about garden features, and a post with photos of three of our favorite deer gardens.

Thanks for reading!  We hope the card and journal provide inspiration for your garden, or at least a few minutes of fun.  If you would like to learn more about Mosaic and how we can help you create your garden, visit mosaic-gardens.com or call 541.434.6467.

ContainerMania

Container plantings are a great way to add whimsy, color, screening and focus to "hard" areas of your garden, such as patios and decks.  Somehow, though, while gardeners enjoy the initial rush of buying and planting, they are often underwhelmed by the result.  While we have plenty of ideas about the best plants and styles of planting for containers, how to plant them, and so on, we think the most important aspect of container plantings isn't the plants at all....  Here are a few ideas for finding and laying out the perfect containers for your project.

  • We're loathe to use the word "pots," when great containers have been made from stock tanks and garbage cans (AKA dustbins).
  • Bigger is usually better.  We like to cluster a few pots of various sizes.  Often the tallest pot in our clusters is 36".  Taller pots bring the plants closer to eye level, rather than calling for attention from knee height.
  • We've said it many times before, but simple forms are the way to go.  Ornate pots create a busy visual effect that distracts from the cool shape of the pot and all of those great plants.
  • Pull it all together.  Rather than spreading your containers out, one here, two there, cluster them together.  Even small pots can have a big impact when drawn into a big mass.
  • Location is always key.  Take time to find the perfect spot and layout for your carefully selected containers.  Prioritize the views from important windows, doors and paths, and spend time moving the empty vessels around before you start to plant.  A few inches to the left or right might help everything come together perfectly.

A gallery of container plantings for a little inspiration:[gallery link="file" order="DESC" orderby="rand"]

Happy Containerizing!

Slowly but surely....

Summer is coming.  While the wet, cool weather has many people wondering if the April showers will end by July, the plants are quietly preparing to surprise us in warmer days to come.  I saw our first waterlily bud this weekend, and the heat-loving plants have pushed a surprising amount of growth in the last week or so.  It's possible that this rainy spring will bring us a summer to remember.

ColorTextureForm - Mosaic Newsletter #8

Howdy!

We hope our last newsletter was helpful in your spring garden work.  If you haven't checked in since then, we expanded on our spring cleaning theme with a little about gardening tools, ideas for growing food in busy lives and tough spaces, and tips for making a beautiful garden scene. Beyond those ideas, we've posted some neat photos, a winter post-mortem and more, so be sure to scroll through the journal when you're done.

In this newsletter, we'll discuss how we use color, texture and form to select and place plants in our gardens.  The terms color, texture and form are used together so often in articles, books and lectures about planting design that they are almost cliche, but what do they mean for your planting design?  Even a quick survey of online articles shows a huge variety of ideas for designing with those terms in mind.  While one designer may prioritize flower color and structure, another focuses primarily on the texture and shape of leaves.

In our work, color, texture and form carry equal weight, and we have strong ideas about the best way to see and use each one.  We select our plants to create a cohesive palette, sometimes subtle, sometimes high-contrast, that reflects the desired style and mood of the space.  Because the possibilities are endless, and the results should reflect you and your aesthetic, we will focus on how we think about color, texture and form, leaving the nitty-gritty fun of building a palette to you.

Color

Foliage first - While flowers are fun and part of almost every garden, foliage color is the foundation of our plant color palette.  We use foliage to create sweeps of color throughout the year, or at least the growing season.  The colors vary from bold, contrasting spots of yellow and purple to accents of silver and burgundy to shades of green.

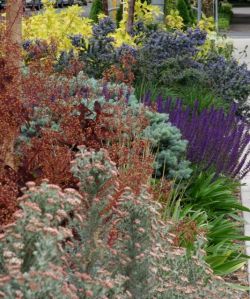
Know when to hold 'em - Even in a bold palette of strong, bright colors (restraint does not mean boring), restraint is key.  We intentionally leave out some colors or save them for another area.  If you love every color, or are the sort of person who can't leave a good plant at the nursery, try using different palettes in different areas of the garden.  As you can see in the first photo, our front garden has lots of bright, hot color, while the side garden, at right, tends toward gentler pinks, blues, creams and whites.

What are we talking about here? - What we mean by "form" is the overall shape of a plant - upright, round, conical, weeping, arching, and so on.  Sometimes form and texture overlap, as in spiky plants, like iris and Phormium, but for the most part, form has more to do with outline than texture.

Round, rounded, roundish - Every plant has a form, and some are stronger than others.  Not all strong forms are geometric, but those are the easiest to discuss.  For example, lots of plants have what we call a "roundish" form, where the outline more or less radiates around the center.  Other plants have a more perfectly rounded outline.  Picea sitchensis 'Papoose,' for instance, is almost spherical.  A stronger form makes a stronger statement in the garden, and can be used as a structural, almost sculptural element in planting.  We will shear some plants, like boxwoods and fine foliaged conifers, to tighten and perfect their form.

The dance - In many of our gardens, we select a plant with a strong form and "dance" three to seven of them through a layer of lower plantings.  The repeating, usually evergreen, forms have room to shine, while the lower plantings add seasonal contrast and interest.

Another perspective

Not all designers think alike (thank goodness), and if you are seeking a different, nuanced, and perennial-savvy take on color form and texture, we highly recommend designing with plants by Piet Oudolf with Noel Kingsbury.  Oudolf's sensitivity to tiny differences in, say, flower shape helps him create ever-changing, intricate, romantic plantings.  What an inspiration....

That's all for now, folks!  We'll be back over the coming weeks with more ideas and, everyone's favorite, new photos, so please check back soon.

busy week!

We don't have much time to post this week, but we thought we'd post a couple of photos of the coast project.  These were taken last spring.  It's almost photo season, so there should be lots of new images coming....

We'll be back soon with a newsletter and more!

Arizona Spring

Our friends, David and Ginger Starck just sent pictures of their young "winter" garden in Yuma and some beautiful desert wildflowers, and we thought we'd share!  Gorgeous, hunh? [gallery link="file" order="DESC" columns="4"]

These two are great gardeners.... Their wonderful, rambling "summer" garden near Creswell deserves a post of its own - maybe this summer when we're all wishing our garden were as cool and shady as theirs.  For now, you can get a taste here (and if anyone can find a link to the terrific Oregonian article, please send it!).

Spring Cleaning - Mosaic Newsletter #7

The weather can't seem to make up its mind right now, which must mean it's spring....  Clear and warm!  Wind and rain!  Snow in the hills!  Hail and sunshine!  No matter what the weather brings, lengthening days and budding plants draw gardeners outdoors.  Once we've caught up with the weeds, pruning and other chores that keep our garden and our clients' gardens tidy, we turn our minds to improving the spaces.  In this newsletter, we offer a few of the core concepts that help Mosaic develop, rather than just "maintain," new and existing gardens.   Over the next few weeks, we'll post more ideas that might improve your garden while making gardening a bit more fulfilling, so check back at the journal!  [Edit: Idea #1 - Tools of the Trade]

iSubtraction
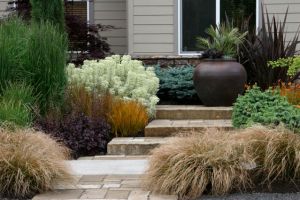
For many gardeners, spring brings opportunity to add to their gardens - all those colorful, promising pots at the nursery, a piece of garden art, or that new idea from Sunset.  For us, it's the perfect moment to subtract.  We look for plants that are overgrown, declining in old age or are just-not-right, and off they go to a new home or the yard debris bin.  One of our greatest design assets is our willingness to start over, on one plant, a whole bed or a whole garden.  There are almost always better solutions waiting to earn their place in a garden.

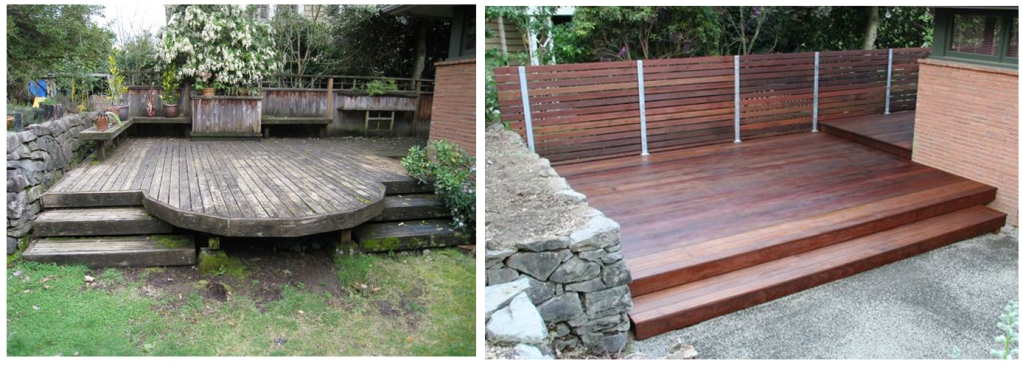
Subtraction doesn't need to stop in your planting beds,  Our clients are amazed at how much better their yards look after the demolition phase, when we've removed not just non-performing plants, but low borders, unnecessary hardscape, and crumbling garden art.  While "demo" doesn't need to be extensive, an empty palette is a relief and an opportunity to create a better, simpler, more beautiful space.

iSimplify
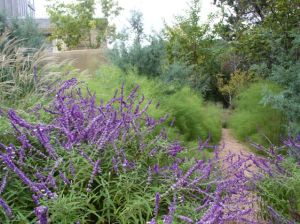
"Sometimes you have to think and think to get something simple" - Ron Lutsko

Filling a hole in a bed can feel a little daunting.  In our plantings, we've don't look far for our first ideas.  We consider what plants in that bed, or similar nearby beds, are thriving, and work from there.  Often, we're able to incorporate and expand on a nearby success story.

In new beds or just filling in, planting in groups of three to forty creates a coherent, rich palette with the added bonus of lower maintenance.  You can create waves of year-round color and texture by selecting the best performing plants for your space.

Beyond planting beds, we believe in simple features and clean, strong lines in the hardscape (a concept that needs its own newsletter or three).  Simplifying the "hard" elements of a garden doesn't require a complete remodel, however.  Most spaces have elements in which a little simplification would go a long way.  The edges of lawns are one place to consider. Could a straight or curved line make the lawn a simpler, more pleasing shape?  What if you were to cut out that  peninsula of sod, and connect the surrounding beds?
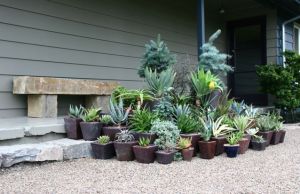
Consider paring down or reorganizing anything that adds clutter to your space.  From pots to garden ornaments, we sometimes just have too much stuff.  Did you know that some good gardens never make it past the magazine editors, because they have too many little distractions in the beds, around the seating areas and everywhere else?  Removing a few things and concentrating others into an higher impact feature will focus attention on the best parts of your garden, rather than distracting from them.  The collection of pots in the photo of our bench, below, "works" because we clustered them together at an important spot.

iMake room for people
We often describe ourselves as a garden design/build company, but we really think of ourselves as creating outdoor spaces for people.  Building a space that lets you, your family and friends spend more time in your garden is our primary goal.  Of course, building a comfortable, human scale space can be a major undertaking, but it can also be as simple as improving a path, so you walk through the garden more often, or adding a bench with a pretty view.  We have many ideas about creating seating areas and other people-friendly spaces, but the fundamentals are simple:

  • Comfort - make sure seats and benches are comfortable, substantial and stable.  Take time to level the seats and their foundation.
  • Breathing room - broad paths and open seating areas are more inviting and don't get lost in the summer jungle.
  • Quality - do your homework and prep work before laying a path or any hardscape.  Solid footing is vital, as unstable, uneven surfaces can keep people away.

iA little less water goes a long way
When we first planted our garden, we gave our plants a running start with great soil, a little food and plenty of water.  As the plants established good root systems, most showed little stress in hotter, drier periods.  A few plants, however, would wilt and crisp at the tips if we didn't increase the irrigation.  For awhile, we watered enough to keep those plants, if not happy, then not miserable or dead.  But somehow it didn't feel right to irrigate an entire garden to accommodate a few plants.

Eventually, we decided to water less frequently.  If an established plant couldn't handle the drought, it died or found a new home.  Today, our garden is full, diverse and lush, and we're thrilled to use a little less of a precious resource.

We wrote about using less water in another post, which we hope you'll read, but the concept is simple.  Most of us water more often than most of our plants require.  Try waiting an extra day or two between watering cycles this summer.  While a few plants will decline, you will probably be surprised at how many plants are up to the challenge.  You may even find that some plants, like ornamental grasses and some conifers, prefer less water.

Thanks for reading!

We hope we've offered a little inspiration for your spring cleaning.  Over the next few weeks, we will share a few more ideas for developing your garden, so stay tuned.  If you're ready for more ideas now, take a look back at our fourth newsletter.  Spring always brings lots of ideas, photos and news, and we look forward to sharing them with you!
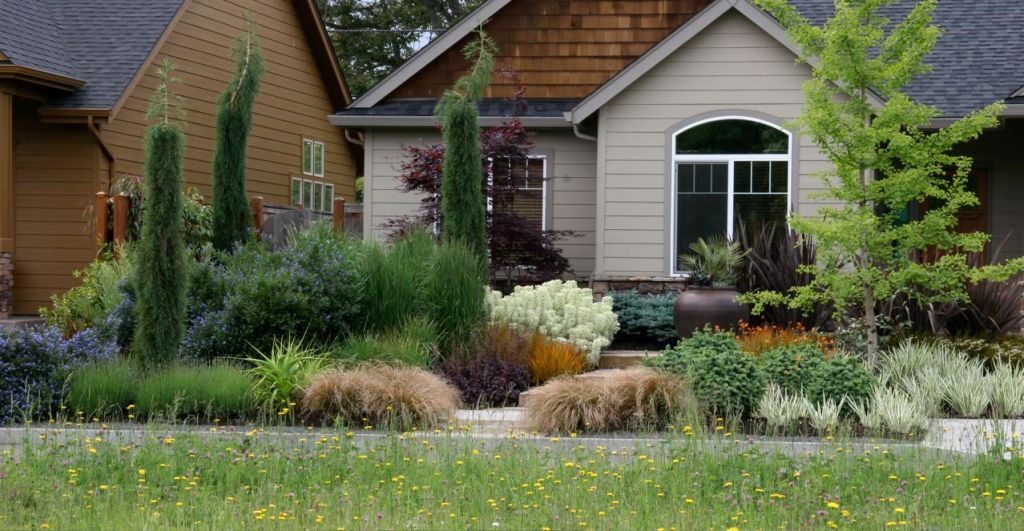
Mosaic Q&A - Austin photos

Have a question? Want more frequent updates? We’d love to hear from you! Read more here and/or write us in the comments or at mosaic@mosaic-gardens.com.
Below is a comment we received a few weeks ago, that we thought would be a fun addition to the Q&A:

I’ve admired your Oregon garden in several magazine spreads and have known about your inspirational design website for a while. But I just found your blog and am working my way through it, enjoying your beautiful garden pictures. I garden in Austin, your former hometown, and would love to see more images of Buell’s Austin garden. Have you posted any other pics of it–or do you plan to?

We've re-posted the photo that inspired this question request above (originally in this post). We lived in Austin before our move to Oregon in 2002. Unfortunately, we only have a couple of good photos of Buell's garden, but they do show what you can do with low, almost no additional, water plantings in a hot climate. Good inspiration for all of us in milder regions, don't you think? Here's another photo of the garden, with a better look at the Goldsworthy-inspired "Beehive" sculpture Buell made from recycled limestone.

For fun, we put together a gallery of some of Buell's work for Gardens, a landscape architecture design-build firm in Austin Texas. Obviously, we have different plant and materials palettes in the Northwest, but the threads of contrast in planting and strong, enticing hardscape carry through to our work in the PNW. Click on thumbnails for larger images.

[gallery link="file" columns="5" orderby="rand"]

Would you like for us to discuss a photo, design concept or plant in greater detail? Please leave a comment or write us at mosaic@mosaic-gardens.com. We very much enjoy hearing from you, and we need your help to make the Q&A a success!
Mosaic Q&A - Picea pungens 'Globosa Nana' and other dwarf forms

[Edit: Hi!  This page gets a lot of traffic, so we thought we'd make sure you knew about the rest of our journal .  We update regularly during the growing season and hope you'll check back in.  Thanks for stopping by!  Mosaic]

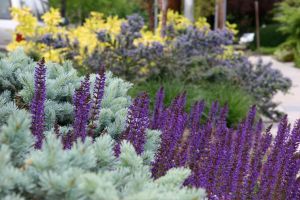
A journal reader from California had a question about the "gray/silver plant in the left foreground" of the photo at left. The photo originally appeared in Newsletter #4, in which we discussed how to create lower maintenance gardens. The plant is Picea pungens 'Globosa Nana,' a dwarf form of the Colorado Blue Spruce, and it is a soft-looking, deer resistant, drought tolerant, low-maintenance all star. We use a variety of Picea pungens dwarfs, whose silver to blue color and compact, rounded forms add form, color and texture to our gardens throughout the year. We will use single large specimens or let three to seven pungens dwarfs dance through lower plantings. Below is a gallery of Picea pungens at work in our gardens - click for larger images.

Thanks for the question! Look forward to reading more!

1

[gallery link="file" columns="4" orderby="rand"]

.

Baja Inspiration

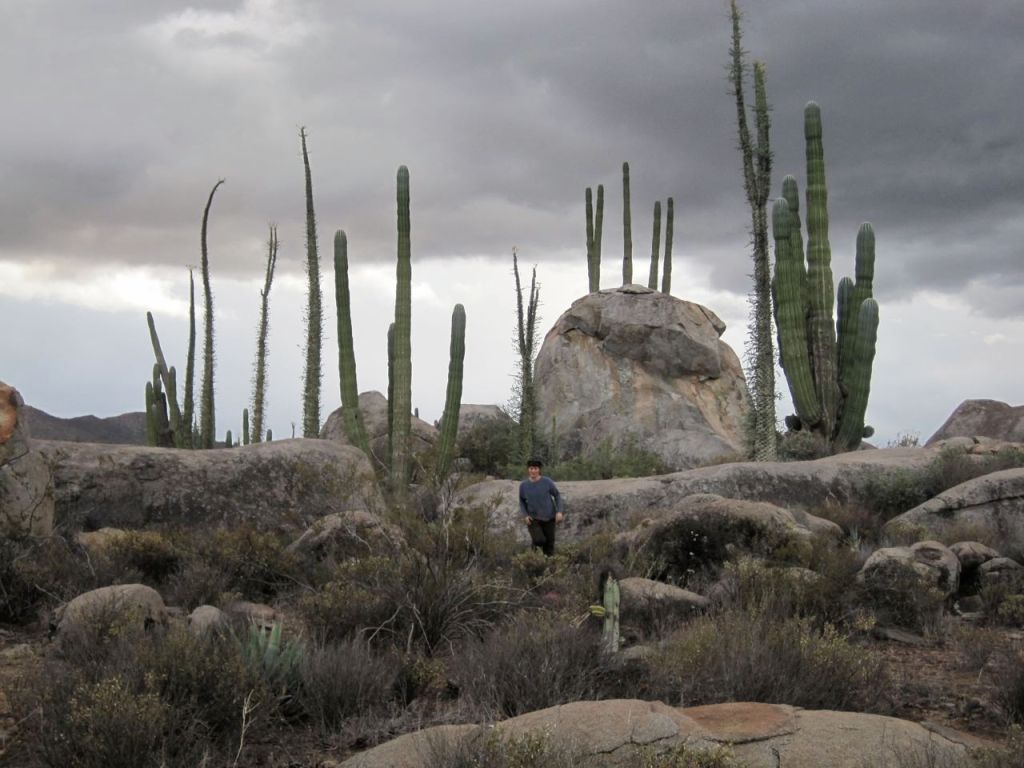
Central Baja landscape

On the advice of Rebecca's wise, artist mother, we will not try to contain the sights and experiences of our trip to central Baja in words. We do hope we can share a bit of inspiration through the gallery below. Just click on the photos for a closer look.

Just two observations:

1) Gardeners are everywhere. In dry, windswept, rocky terrain, miles from the nearest asphalt or basic services, people built stone borders and walls and transplanted and cared for native plants. Some were creations of visiting "gringos," like the river rock garden in the gallery, but most were built by locals. The photo at left, while far from the best of our shots, shows a small garden near a fish camp on the Pacific coast. The buildings in the fish camp had no plumbing, electricity, or even windows, beyond a hole in the wall, but the handful of fishermen had cultivated a handful of striking plants, collected from inland hills, along a path to the bay.

2) A good time was had by all.

i

i

[gallery columns="5"]

Sit. Stay. Mosaic Newsletter #6

Happy fall! The weather switch has flipped, and the days are growing shorter. It's a perfect time to consider garden goals for next year, and in this newsletter, our last for the year, we'll share a few ideas for creating a well-used and well-loved seating area. A little time measuring and drawing now, with plenty of time to ponder, may help you build your own beautiful outdoor room by next summer.

When sketching our first concepts for a space, we often start by pondering the location and design of seating areas. Of course, each element influences the others, but outdoor rooms for entertaining, eating or just relaxing are the heart of many gardens. Below are a few rules of thumb to help you design your perfect seating area.

A courtyard dining room, just outside the kitchen, maximizes human space while maintaining a little distance from the neighbor's cedar fence.

Function is key to a successful, well-used seating area. From beginning to end of your design process, return to the questions of how you will use the space. Do you want an intimate dining room for two to four, an area to barbecue with a crowd, or a cozy nook for meditation? Have you chosen materials that will make the space easy to use and care for? Great design matches form to function, and focusing on your practical goals for a space will answer more questions than any article could.

The cantilevered ipe bench in the right size of this photo is a private, shady spot to relax.

Location, location, location. Consider how the area will relate to the house and the rest of the garden. Areas for eating and entertaining are best located with easy access to the kitchen. If you think about how many trips you take to and from the table before and during a dinner party, suddenly the cozy, shady spot at the back of the property seems like a long way away. Conversely, a short journey through the garden and a little privacy can make a quiet bench seem like a world of its own. In any space, a great view of the rest of the garden (or the greater landscape, if you're that lucky) is always an asset.

Fit the size of a seating area to its function. Even a modest dining area, for instance, needs room for table, chairs, and a comfortable flow of traffic. Likewise, a quiet spot for a couple to enjoy the sunset should be small enough to feel intimate, but with enough space to not feel overgrown or cramped. These are simple concepts, but they can be overlooked in a challenging space. In the courtyard garden pictured at the beginning of this article, we transformed a tight, rarely used space, hemmed in by the house, the neighbor's fence and a thick laurel hedge, into an outdoor dining room. We had to be creative with other aspects of our design, from planting in narrow beds to screening for privacy, but making room for people came first. The stone patio is the perfect spot for an al fresco dinner for four, with room to serve and mingle.

The ipe deck is our most used garden room.

Think outside, around and through the box. It can take time and lots of creative thought to discover a solution beyond obvious, flawed options. When we moved into our house, there was no good location for an outdoor dining area. Every obvious place was too exposed to the street or too out of the way. We weren't willing to settle however, and after what seemed like ages, we came up with the idea of adding a sliding glass door off of our bedroom onto a house-level ipe deck. The deck is such a success that we hardly eat indoors in the summer. Don't give up when finding the perfect location or layout takes a little head scratching or a minor remodel! Consider the desired "feeling" of your space. A warm, open space with a view over the garden feels very different than a cozy, shady corner. Surrounding plants and hardscape will strongly influence the ultimate feeling your seating area, but the unchangeable conditions of a space, such as exposure and elevation relative to the house and the rest of the garden color its character.

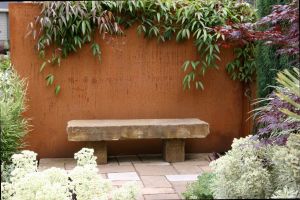
We used a rusting steel wall and plantings to separate and screen the Gregory garden's seating area from the neighbors.

Mind the edges. When possible, leave at least a narrow layer of surrounding plantings between a seating area and the nearest fence, hedge or property line. The aesthetic softness will make a seating area feel more comfortable and part of the garden. When that is not a possibility, as in the Gregory garden at right, creative selection of screening materials makes all the difference.

Materials matter. There are many options for the "floor" of a seating area, and no one option is right for every circumstance. Pea gravel can be a soft, cohesive, inexpensive solution, but it requires regular maintenance and is rarely the right choice for a dining area where chairs will displace the gravel each time they are moved. Well-laid flagstone can be a beautiful, solid surface for a dining area, but may be overkill for a simple bench.

A custom metal bench anchors one end of this simple, pea gravel terrace.

Finishing touches. When you have created your beautiful space in the perfect spot, treat yourself to some good looking furniture. Sometimes a great seating area is rarely used, just because there is is not a comfortable, attractive place to sit. We sometimes design furniture to fit one of our gardens, but there are many fun options, from retail to resale to repainting an old chair a fun new color.

Thanks for keeping up with us! We hope you enjoy all of your fall adventures in and out of the garden. We look forward to checking in on the journal and in our next (spring 2010!) newsletter.

Furniture

Sometimes, a garden needs one final touch to bring it together. When that final element can be a functional table, bench or chair, all the better.... We have designed custom furniture for a few of our gardens, a feat that inevitably requires more time, effort and head scratching than we could imagine. Those big stone benches require a little sweat equity, as well. Somehow, the results are always enough to make us willing to dive in again. Cantilevered ipe and steel bench (photo by Robin Bachtler Cushman)

Steel bench

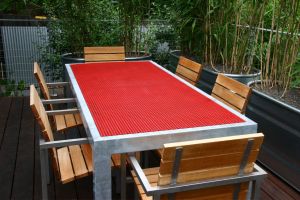
Steel table with perforated top (chairs by Henry Hall)

Sandstone bench

Sandstone bench with rusting steel wall

Steel table with perforated top, and our first (and only?) chairs

Harvest Season - Mosaic Newsletter #5

Fall harvest

At first glance, the geometric structure required by the way most of us garden (rows of vegetables in rectangular or rectangular-ish raised beds, surrounded by straight paths) may seem limited, but a little thought and creativity offers a range of solutions and feelings from formal and sculptural to whimsical. We consider the necessary rectangular forms and pathways a jumping off point for design, rather than a limitation. Once we've got the basic form in mind, we consider materials for borders or retaining. Stone, metal, and wood all present a variety options for finishing the structure of a garden.

We planted our first veggies before the rest of the garden was complete.

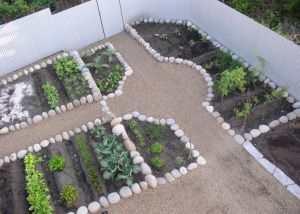
In our garden, the best space for the veggie garden was in a lower, sunny corner of our property. The straight lines of the paths and circular "roundabout" continue the overall design of the ornamental garden, and the pea gravel paths and surrounding corrugated, galvanized fence emphasize an overall continuity of materials. Rather than continuing to use the rough, straight edged basalt that forms the borders, walls and stairs of our ornamental garden, however, we bordered our raised beds in large, round river rock. The river rock softens the lines of the veggie garden, and playfully frames the herbs, strawberries and other low plants that spill over the borders. The aesthetic center of our veggie garden is the Vietnamese urn water feature at the intersection of our main paths. The urn is visible from the upper garden and punctuates the long axis of our narrow space. The circular space around the urn cuts into the straight lines of our raised beds, at once playing off of and playing with the surrounding, mostly rectangular, geometry.

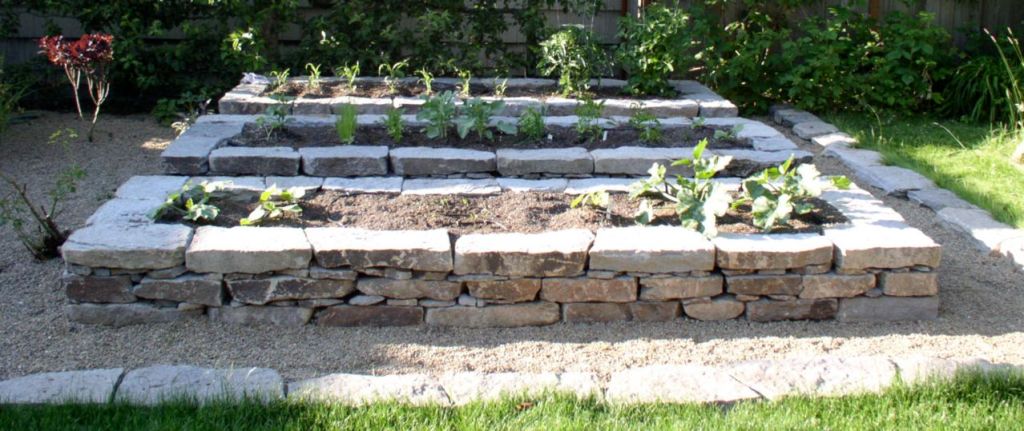
Our space reflects our desires and priorities (cohesiveness of design and maximizing usable space, among others). The veggie gardens we have created for clients vary with their goals. One client was a busy mother with a strong design sense. She wanted to involve her young boys in growing some food, but she was more interested in having a "sculptural" garden that was easy for her and the boys to work than in maximizing planting space that she would not have time to maintain. We built three long, narrow, rectangular raised beds from dry stack basalt. Their unusual forms look great even in winter, and grow gorgeous peppers and other heat-loving crops in the summer.

These long, narrow raised beds are perfect for our client who wanted a small, sculptural garden to work with her sons.

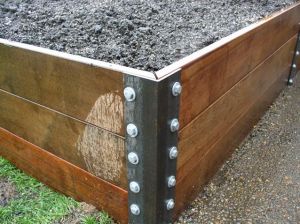
A simple, portable ipe and steel framed veggie box

Another client wanted a simple, contemporary box for their veggies. The catch was their request for a portable design they could take with them if they moved. We bolted ipe (a sustainably forested tropical hardwood) to rusting metal corners, which extended below the wood and doubled as stakes to hold the box in place.

There are so many more ideas and materials to try, and we love the challenges and rewards in designing vegetable gardens. Just the ideas for retaining (vertical flagstone, rusting metal, how about a mini-gabion wall?) seem endless. Each space and lifestyle offers challenges and inspiration for design well outside the ubiquitous cedar box.

iA Little Help

We love growing food. Our veggie garden and orchard take a third or so of our usable garden space, and we dream of having more space to grow all of the things that we can't cram into our little property (brussels sprouts! pumpkins!). That said, our expertise is in landscape design and construction, not in producing food, and what success we have in growing fruits and vegetables is due in large part to research and strategic questioning of farmers and home gardeners many times more experienced and knowledgeable than we are. Below are a few of our favorite resources. We'd love to hear about yours!

One of Robin's photos of the farmer's market

  • The Lane County Farmer's Market and other local farmer's markets - Local farmers know what, when, where and how to plant, cultivate and harvest, and most of them are generous with advice. Two of our favorite farmers at the market are Grateful Harvest and Ruby and Amber's (they cultivate by horse power!). The market is also the place to buy starts in the spring - try Ruby and Amber's tomato starts next year....
  • Growing Vegetables West of the Cascades by Steve Salomon - Everything from planting calendars to best varieties for our area.... This is the Willamette Valley veggie geek's best friend. It has awfully high expectations for those of us on smaller lots, and we would quibble with a few particulars, but our copy is dirt smudged and dog-eared for a reason.
  • Territorial Seed Company - Seeds and starts grown in Oregon, with many organic options available. One of our greatest early season joys is the March delivery of the year's seeds.
  • The Oregon State Extension service - lots of information on fruits, vegetables, pests, and regional differences. We just found this cool pdf with information and planting calendars for different regions of the state.
  • Robin Bachtler Cushman's photographs are terrific inspiration. She chronicles our local farms and vegetable gardens. If you happen to be on the LCC campus before September 21, her work is part of a show, "Markets," at the David Joyce Gallery.

These are just a handful of the terrific local and regional resources, including many exceptional home gardeners who are happy to share their experience and advice with the rest of us.

Thanks for keeping up with us! Fall is a wonderful time to be outside, and we hope the next month brings plenty of beautiful weather for gardening and other adventures.

Best,

Rebecca & Buell